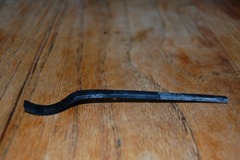
Making a hand forged spoon carving chisel
This all started with a rusty ring:
I have been wanting to do some blacksmithing for a while now and I just got my excuse. My neighbor had a bucket full of these rings. They are end cut offs from larger springs. His company had thrown them out and they were just rusting away in has back yard. When he offered that I could have as many as I liked, I took him up on it. Spring steel is lovely high carbon stuff and I have had a need for a curved bladed carving chisel
Why buy it if you can make it?
I could certainly buy one of those beautiful new Flexcut brand scorps, but then I wouldn’t get to make one myself! There is magic in making things and double magic in making tools I’m sure.
We lit the forge up and after some instruction, I got the ring mostly straightened and the curve in the end roughed out.
This picture is just after the initial shaping. I took the the chisel out of the coals and dropped them into a bucket of ashes to cool. Letting it cool slowly like that left it soft (annealed) for finish shaping. I took the rough chisel to the grinder and got the blade edge ground down, close to done.
Once the blade was mostly shaped, it was back to the coals. I got the piece good and hot, almost translucent on a piece this thin, then dropped it into a vat of quenching oil.
This picture shows the chisel with blade shaped, holes drilled for rivets, and fresh out of the quench. (click on any of the pictures to see them larger)
Too hard to use
When the blade comes out of the quenching oil, it is too hard to use. It is really brittle like glass – you have to temper it. Tempering is a way to leave the blade hard enough to stay very sharp but not so brittle that it chips or breaks. I polished it up so I could watch the colors change and into the oven it went. When it got to a the right color for the temper I wanted (I went into bronze-ish), I cooled it again.
Here is the finished chisel:
I had this piece of walnut burl in the scrap bin and I used 1/8” brass rod for the rivet.
I am really happy with how it turned out. Now, we will have all the wooden spoons we can stand! I enjoyed this work so much that I may have to make some for other folks.
Happy Memorial Weekend,
Jim
Related
This entry was posted on May 30, 2010 at 6:32 pm and is filed under Blacksmithing, knifemaking, metalwork, Spoon Carving, Tool Making. You can follow any responses to this entry through the RSS 2.0 feed. You can leave a response, or trackback from your own site.
2 Responses to “Making a hand forged spoon carving chisel”
What do you think? Cancel reply
This site uses Akismet to reduce spam. Learn how your comment data is processed.


June 11, 2010 at 2:55 am
That is beautiful! Way to go.
June 11, 2010 at 12:14 pm
Thanks Davis.