Here are the last two knives I finished:

Here are the last two knives I finished:
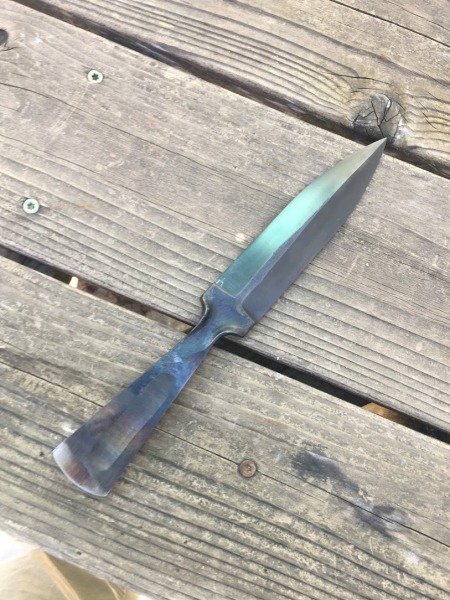
I met Joe Keeslar this year at the ICCE knife show this year and I wanted to make a dagger in his style. Below are some photos of the process.
Here it the initial forging. I started with 1.5″ x 1/4″ 1084 steel:
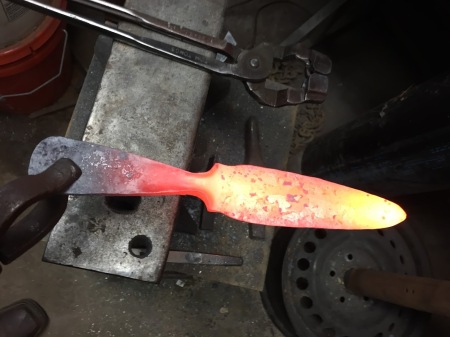
Here is the forging complete:
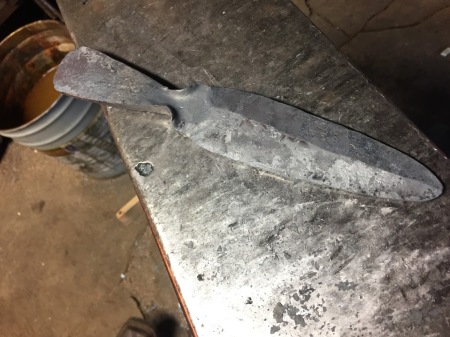
Profiled and finish ground:
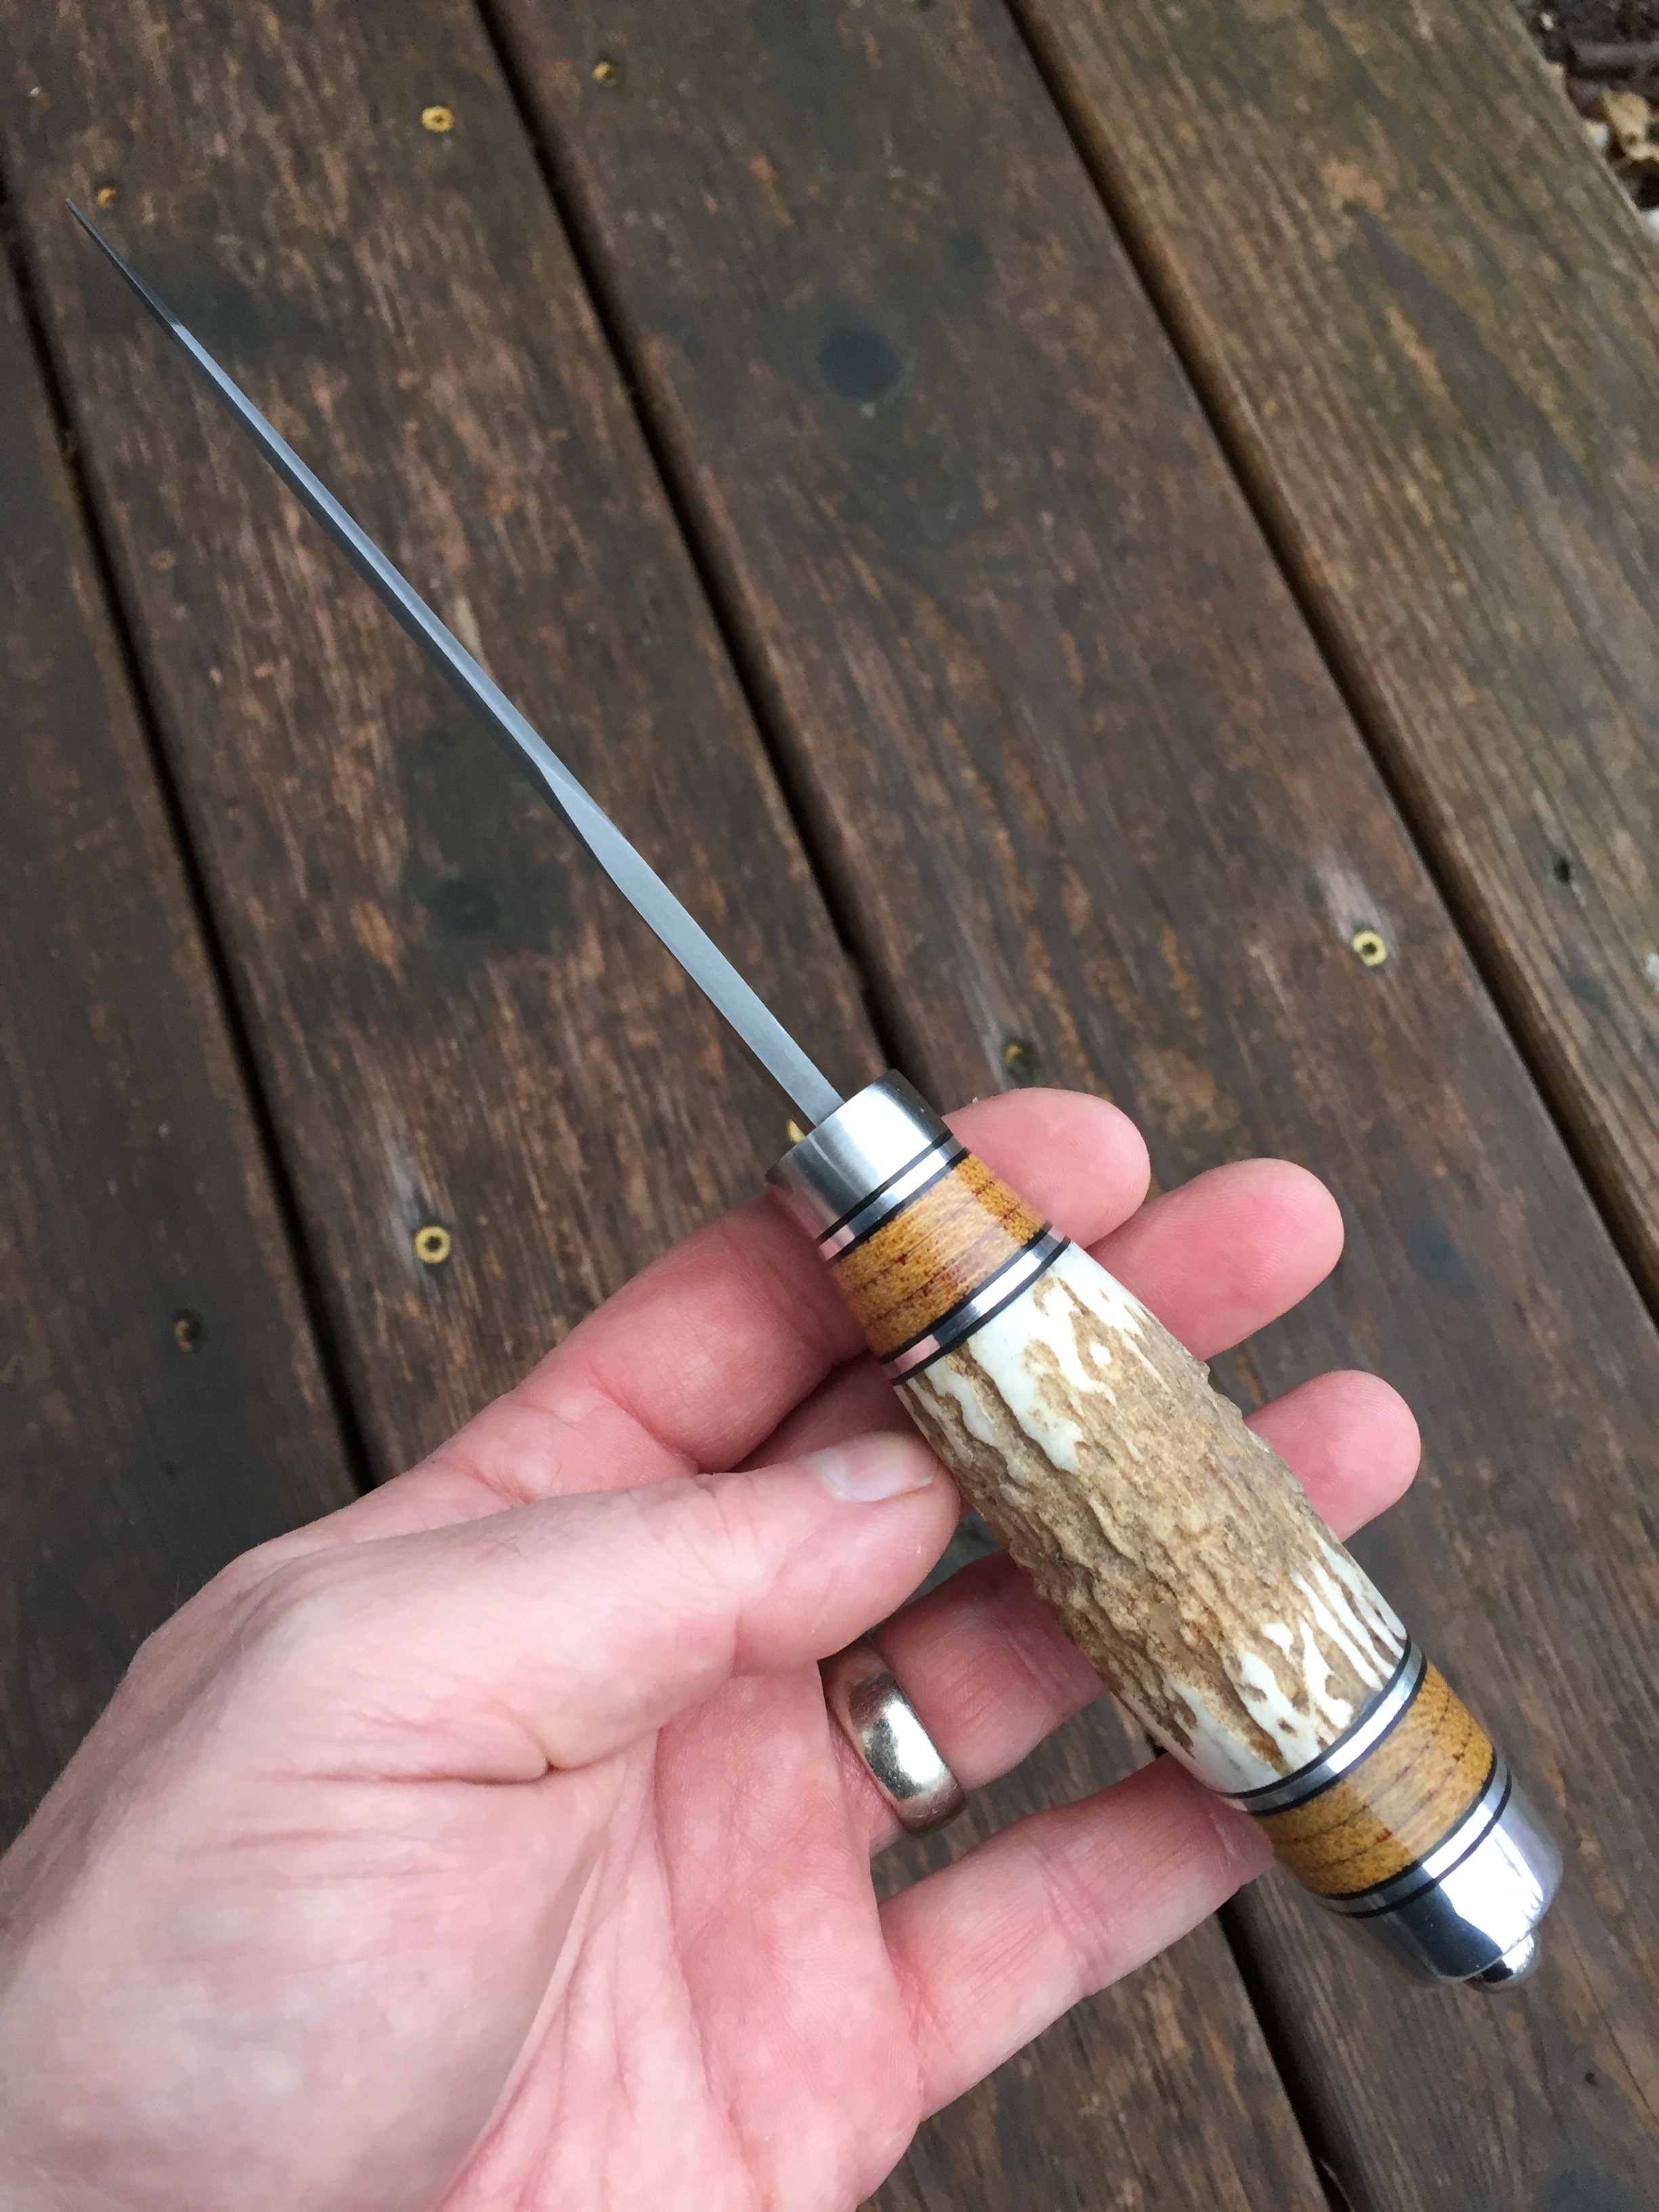
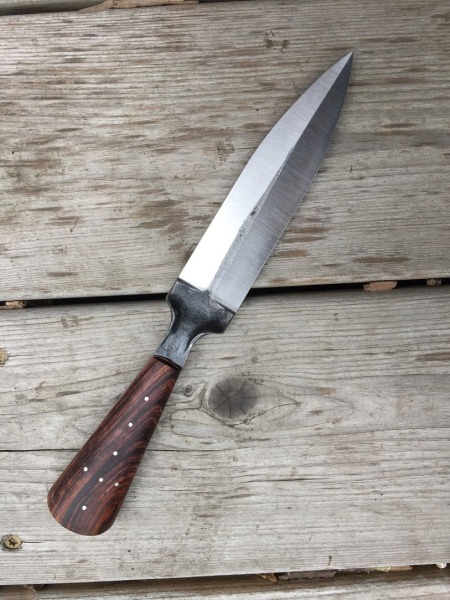
Then a mystery wood handle (rosewood or ironwood, not sure – it was a gift):
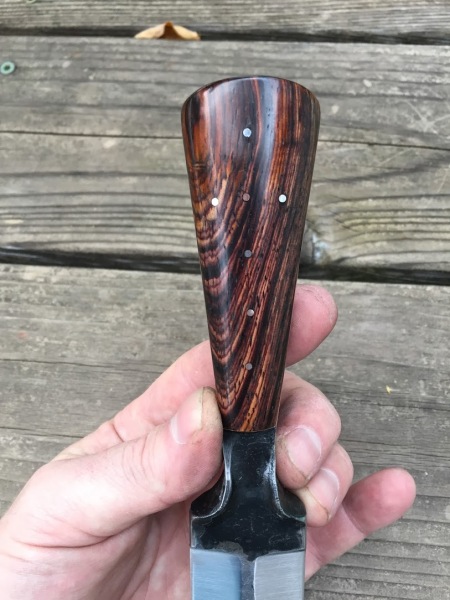
A handle detail showing the sterling silver and copper pins:
I etched my logo:
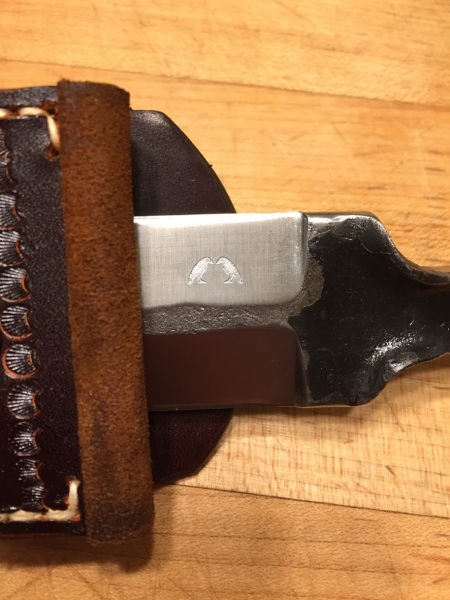
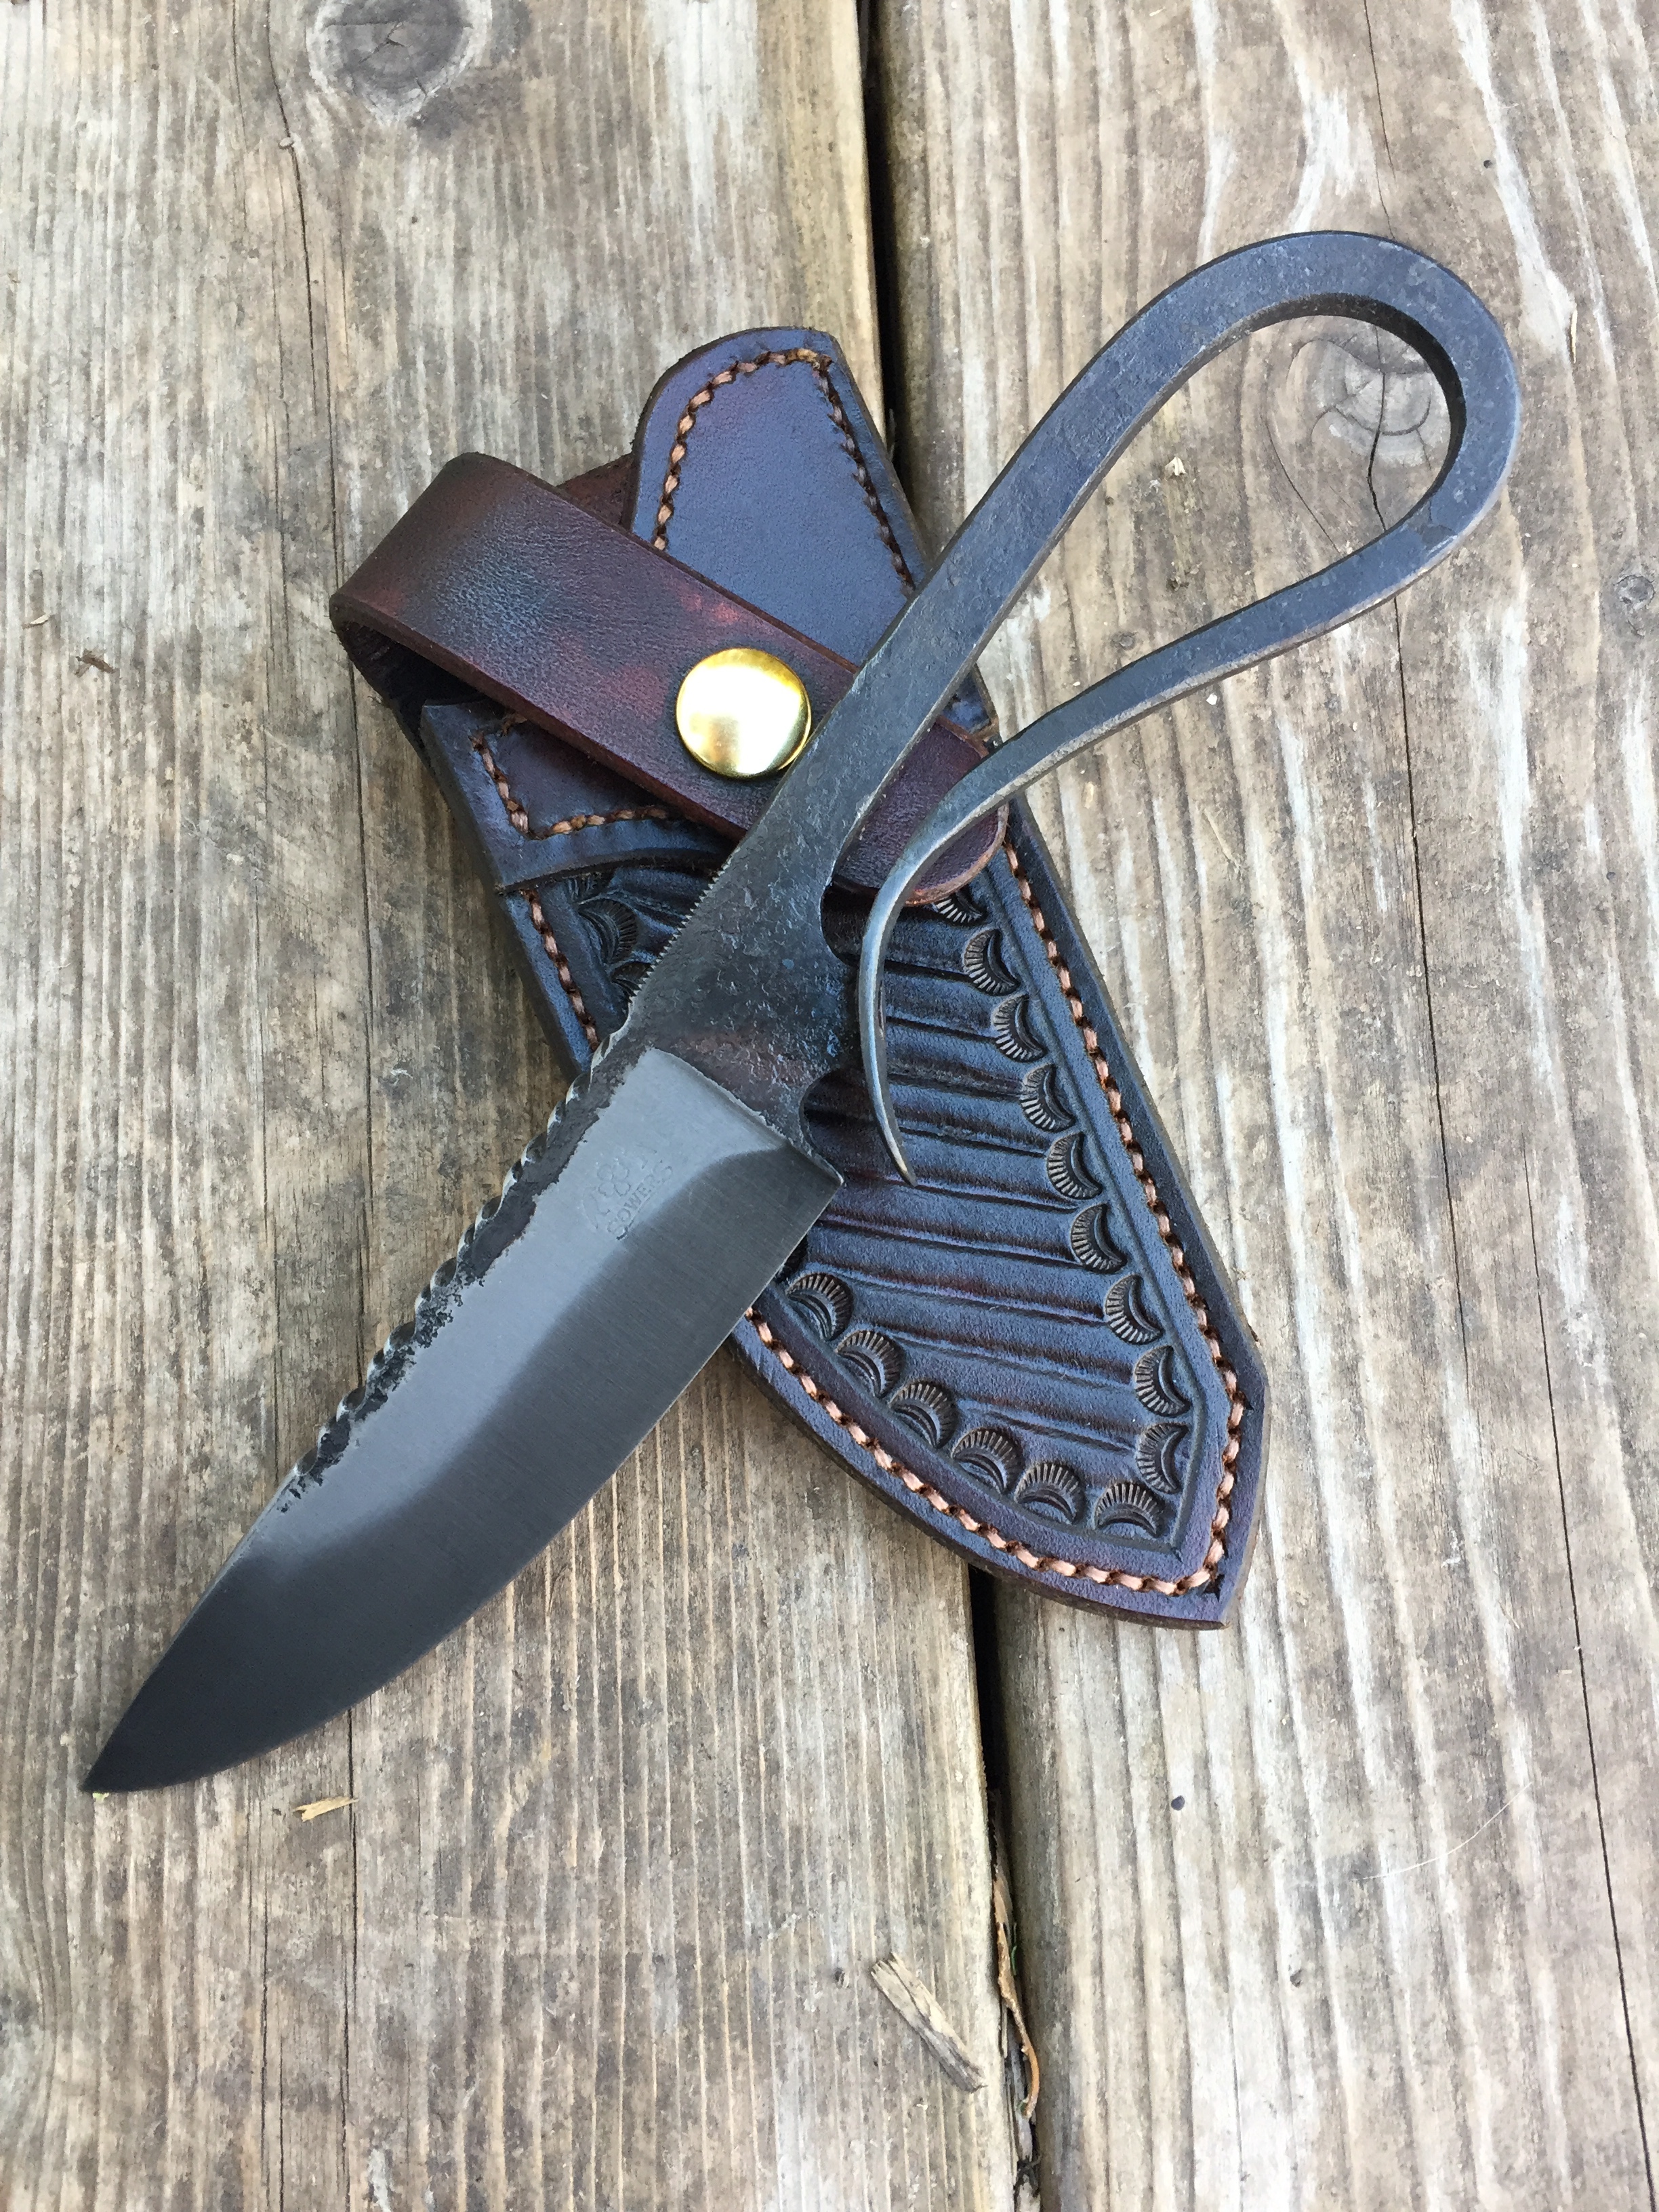
I also made the sheath:
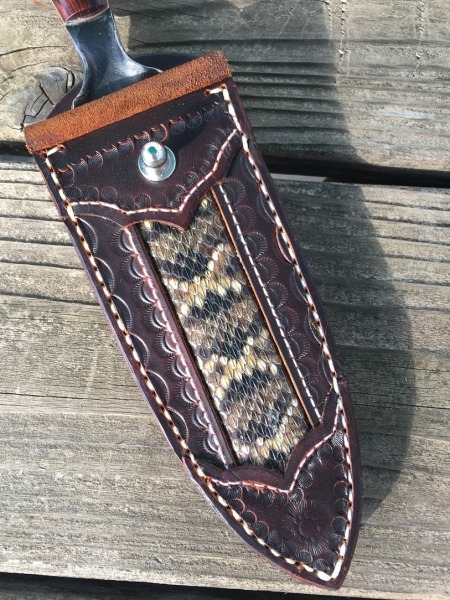
And here is the entire package:
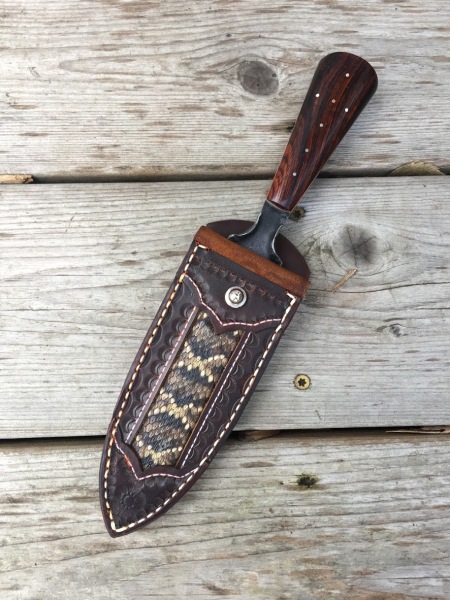
This was a really fun build – it pushed my abilities in both blade and sheath and I am happy with how it turned out.
Thanks for looking – keep making,
Jim
I started this knife quite a while ago. It has been sitting on my bench for over a year – until now.

I made it to be part of a hunting set and showed the smaller first knife here quite a while ago.
Here are the two knives finally together.

I carry the smaller knife as a fixed blade edc pocket knife.
They are both 01 steel with green micarta handles and red liners. The blade on the larger one is about 3″.
I also made the sheath and to be honest – I almost enjoyed that as much as making the knife.
Happy Making and new year to you,
Jim
I got to spend a great day with my dad making knives. I have been interested lately in having a fixed blade pocket knife so, I put together this pattern and we each made the same knife.
Here is how mine turned out:

It is sized like a neck knife, but I specifically designed it to be carried as an EDC (every day carry) pocket knife.

And here it is in its sheath. I made the sheath with the Loveless style cam so it makes a great ‘snap’ when you put it away.

It is comfortable in my front pocket or the leg pocket in my work pants.
Happy Making,
Jim

Two weekends ago, I was lucky enough to attend the American Bladesmith Society’s Heartland Bladesmithing Symposium at Steve Culver’s shop. It was incredible. I learned more than I thought you could learn in two days.
Looking around at all the tools he had, I saw a really cool knife makers vise. It let you clamp a knife in it and rotate the blade to work on all sides while still holding it securely.
I checked online and a store bought vise is around $100.00. I am saving for a propane forge and can’t afford a finished vise so I made this one.
You can put one of these together in a couple of hours if you have access to a small welder. Here are the parts I used:

The main body (gray pipe) is the top tube of an old swing-set I found in my garage and is 2″ in diameter. The gray pipe in this picture does not become part of my finished vise. It is just to show what the yellow pipe looked like before I started.
I cut a piece of this pipe 6″ long and drilled a 3/8 hole in the side. For the hole, I came in about 1 1/2″ from the end. Next, I welded a nut over the hole. You can see this on the yellow painted pipe.
For a tightening handle on the inner vise (yellow pipe), I cut a ‘U’ bolt in half. That gives me the L shaped threaded rod that has a little yellow paint on it. That is what you use to tighten the inner wooden jaws that hold your knife.That might be cheating but it made a really comfortable handle for less than a dollar!
Next, I made the outer vise jaws. These allow you to spin the inner vise and clamp it tight where you need it. I made this from a heavy 2″ fence gate clamp that I got at a farm and feed store. At seven dollars, that was the most expensive piece of the entire vise.
To make the outer vise open and close easily, I bought an extension nut and welded a scrap of 3/8″ mild steel rod on it for a handle:

I also added a spring from the hardware store to make that outer clamp jaw want to open easily. I couldn’t find a spring that was exactly the width that I needed, so I cut a longer one down a bit for this.
Lastly, I made some wooden jaws to go inside directly against the knife itself.

Any 1″ x 2″ hardwood scraps should do for the jaws. I used Barge Cement and put leather pads on this set. I believe that I will make several sets of jaws for different work. I will make one pair with a long lower jaw to support the blades while I am filing them.

There really isn’t much too it. You clamp the bottom bit of the silver chain link fence gate hinge into your regular vise and you can hold a knife in any orientation.
While this isn’t nearly as elegant as the one I saw in Steve’s shop, it holds a blade tight while I am working hard on it.
Happy Making,
Jim
I cannot quit. I just can’t. I am unable to stop making hammers and mallets lately.
A friend salvaged some cherry runners off a pallet where he works and gave me one of the pieces.

I felt pretty good about these. In a couple of hours, I was able to make something useful with this wood instead of it going into the trash.
Happy Making,
Jim
I wanted a 12″ sandbag, but was not willing to spend the $50 or $60 to buy one. I had some good scrap leather in the shop and made my own.
I started by taking 6″ into my dividers.

I drew two twelve inch circles on the back of my leather.

And cut them out with some kitchen shears. I find that good kitchen shears do a great job cutting leather.

I ran a line of Barge Cement around each piece, skipping 1″ to allow for filling. I let the cement dry and stuck the two pieces of leather together. Next, I punched holes around the edge with an awl. I used a saddle stitch and some strong waxed twine to sew the edges. All that was left was adding about six cups of sand.

After pouring in the sand, I glued and stitched the last bit shut. Here is the bag with a sheet metal forming stake that I have been working up in the forge. It started from a circus tent stake. One end is mostly done and the rough end will be a ball shape when I am done.

I had looked for some forming stakes to buy and was astounded at how much a simple T stake could cost. I found several that were three hundred dollars or more. Per normal, I went to the forge and shop and made one.
Happy Fourth of July and happy making,
Jim
